Sell Stickers on Etsy
What if I told you that you only need a printer and a pair of scissors to earn as much as $15,000 to $20,000 a month from the comfort of your own home?
A particular product category on Etsy is really well-liked, and that product category is stickers.
Since stickers are among the best-selling items on Etsy, there is a sizable demand for them. Sellers of stickers on Etsy typically earn large sums of money from their sales. You can start doing this with anyone.
You should pay close attention to this article whether your goal is to replace your 9 to 5 work entirely or just earn some extra cash on the side.
Even if you have no prior design experience, I will walk you through every step of how to start selling your own stickers. I will guide you through every step of the procedure from beginning to end.
Establish your own Etsy store, then use a simple tool to generate designs, plan sales, create stickers, and ship them. It will all be visible to you as it happens.
Now, before we truly get started, allow me to address the following query: Why stickers? Why is selling stickers on Etsy such a lucrative home-based business venture? To begin with, stickers are affordable, compact, adorable, and simple to collect.
They are therefore excellent choices for anyone with even a small amount of disposable income. They are simple to make, and extremely lightweight, which reduces the cost of shipping, and requires very little storage on your end as the seller.
Furthermore, stickers are among the most well-liked items on Etsy. For instance, if I search for “stickers” on Etsy, I’d find pages and pages of stickers for sale.
How to set up an Etsy Store.

Sign up.
Go to Etsy’s website (www.etsy.com) and click on “Sell on Etsy” or “Open a shop” to start the process. You’ll need to create an Etsy account by providing your email address, and name, and choosing a password.
Name Your Shop.
Choose a unique name for your Etsy store. It should be descriptive, memorable, and relevant to the products you plan to sell. Ensure your shop name reflects your brand and resonates with potential customers.
Stock Your Shop.
Begin listing your products by clicking on “Add a listing.” Provide engaging and accurate product descriptions, including details like size, materials, and any customization options. Upload high-quality photos that showcase your products from different angles.
Set Pricing and Shipping.
Determine the prices for your products, considering factors like materials, time invested, and competitor prices. Etsy also allows you to set up shipping profiles, specifying the shipping methods, costs, and destinations for each product.
Customize your shop.
Personalize your Etsy store’s appearance to align with your brand. Add a banner, a logo, and write a compelling “About” section that shares your story and passion for your products. Also, consider adding sections to organize your products for easy browsing.
Choose Payment methods.
Select how you want to receive payments from buyers. Etsy offers options like Etsy Payments (which includes credit/debit cards, Etsy Gift Cards, and more) and PayPal.
Enable the payment methods you prefer.
To enable payment options on Etsy, follow these steps:
Visit the Etsy website and sign in with a username and password. Then go to Shop Manager and click on your profile icon or avatar in the top-right corner, then select “Shop Manager” from the dropdown menu.
This will take you to your shop management dashboard.
After that open the “Finances” section and In the Shop Manager sidebar, click on “Finances” to access the financial settings for your Etsy shop.
Then navigate to “Payment Settings” and in the “Finances” section, click on “Payment Settings” to configure your payment options.
Next, select your preferred payment method and choose the payment method(s) you want to offer to your customers.
Etsy provides several payment options, including Etsy Payments, PayPal, and other local payment methods depending on your location. Etsy strongly encourages sellers to use Etsy Payments, as it provides a seamless checkout experience for buyers.
If you choose to enable Etsy Payments, you will need to provide the required information, such as your bank account details, to set it up. Follow the prompts and guidelines provided by Etsy to complete the setup process.
You will also want to configure additional payment methods i you want to offer PayPal or other payment methods. You can set them up by clicking on the respective options and following the instructions. For PayPal, you will typically need to link your PayPal account to your Etsy shop.
After configuring your payment options, review your settings and click on the “Save” or “Save and continue” button to save your changes.
Once your payment options are enabled, it’s a good practice to make some test purchases to ensure everything is working correctly.
Check that payments are properly processed and that funds are being deposited to your designated account.
It’s important to note that available payment options may vary depending on your location and other factors. Ensure you comply with Etsy’s policies and guidelines for accepting payments to ensure a smooth customer experience.
Set up Shop Policies.
Define your shop policies regarding shipping, returns, and exchanges. Clearly communicate these policies to customers to manage expectations and ensure a smooth experience.
Publish your shop.
Before officially launching your Etsy store, review all the details and see how it looks to potential customers. Edit any necessary information and ensure everything is accurate. Once you’re satisfied, click on “Open Your Shop” to make it live.
Promote your shop.
After launching your Etsy store, promote it on your social media channels, blog, or website to drive traffic and attract potential customers. Utilize relevant keywords and tags to optimize your listings for Etsy’s search functionality.
Manage orders and customer inquiries.
Regularly monitor your Etsy shop for new orders and inquiries. Promptly respond to customer inquiries, process orders, and fulfill them within the specified timeframe.
Remember to continually evaluate and improve your Etsy store strategy. Analyze your shop’s performance using Etsy’s analytics tools, track customer feedback, and consider implementing marketing strategies to increase visibility and sales.
How to Make Stickers?
Following these steps below will show you how to make stickers from your printer.
3 Best Sticker Printers
Ensure that you have an inkjet or laser printer, depending on the type of sticker paper you intend to use. Inkjet printers are better suited for adhesive or vinyl sticker paper, while laser printers work well with label or decal paper.
The Best Printers for Stickers.
The best printers for printing stickers can vary depending on your specific needs, budget, and preferences. However, here are three popular models that are known for their quality and suitability for printing stickers:
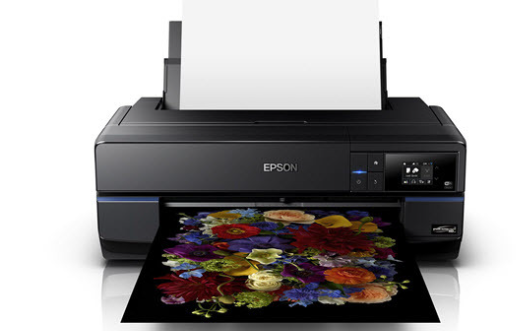
Epson SureColor P800.

This professional-grade printer is widely recommended for printing stickers. It utilizes Epson’s Ultra-Chrome HD pigment ink technology, which produces vibrant and long-lasting colors.
The P800 supports a wide range of media types, including sticker paper. It offers excellent accuracy, detail, and color reproduction, making it a popular choice for photographers and graphic artists.
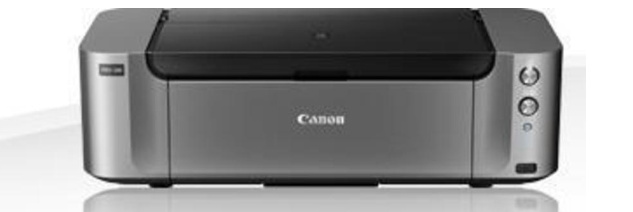
Canon PIXMA Pro-100.

This inkjet printer is highly regarded for its quality sticker printing capabilities. With its 8-color dye-based ink system, it delivers stunning color accuracy and saturation.
The Pro-100 supports various types of media, including sticker sheets, and can print up to 13″ x 19″ size. It is relatively affordable compared to some professional-grade printers, making it a popular choice for enthusiasts and small businesses.
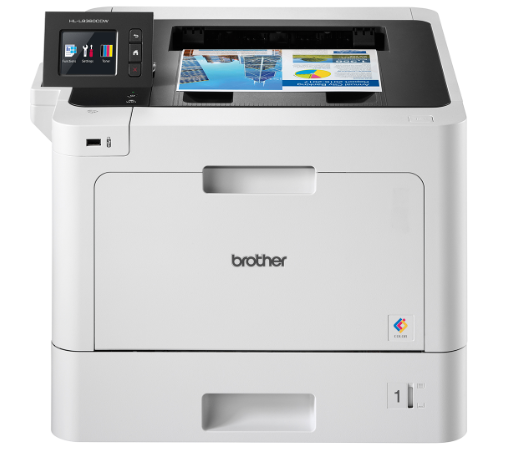
Brother HL-L8360CDW.

If you’re looking for a laser printer that can handle high-volume sticker printing, the Brother HL-L8360CDW is worth considering. It offers fast printing speeds, excellent print quality, and a wide range of connectivity options.
While it may not provide the same level of color accuracy and vibrancy as inkjet printers, it is more suitable for bulk printing needs, such as large quantities of stickers.
Think
Consider factors like printer resolution, ink quality, media compatibility, and the overall cost of consumables (such as ink cartridges) when choosing a printer for sticker printing.
It’s also a good idea to read reviews, compare specifications, and possibly test out sample prints, if possible, to find the printer that best meets your specific requirements.
Select Sticker Paper.
Purchase sticker paper specifically designed for your printer type. Sticker paper comes in various types such as matte, glossy, clear, or colored. Consider your desired finish and purpose when selecting the appropriate sticker paper.
Design Your Stickers.
Use graphic design software like Adobe Illustrator, Photoshop, or even free tools like Canva to create your sticker designs. Make sure the dimensions of your design match the size of the sticker paper you have purchased.
Set Up Printer Settings.
Configure your printer settings according to the sticker paper type you are using. Adjust settings for paper size, print quality, and any specific settings recommended by the sticker paper manufacturer. Refer to your printer’s user manual or online resources for guidance.
Print Your Stickers.
Load the sticker paper into the printer’s paper tray according to the manufacturer’s instructions. Open your sticker design file and print the desired number of copies. Allow the printed stickers to dry completely before handling.
You may want to do a test print first.
Cut and Trim.
Once your stickers have dried, use scissors or a paper trimmer to cut out each individual sticker. Take your time to ensure clean and precise cuts. If your designs have intricate shapes or patterns, consider using a crafting knife for more precise cuts.
Apply a Protective Layer
If you want extra protection for your stickers, especially if they will be exposed to elements like water or sunlight, you can apply a clear or glossy adhesive laminate, or a clear topcoat specifically designed for stickers.
This will help preserve their quality and durability.
Now your homemade stickers are now ready to be used! Peel off the sticker backing and apply them to surfaces like notebooks, water bottles, laptops, or wherever you desire.
Final Thoughts
Whenever you see people saying it is easy t make money online be careful. It always takes some work. I have looked at a lot of websites offering “Money for Free”, and they are all B.S. unless you win the lottery.
No work, no money.
Steve

Some links on this site may be affiliate links, and if you purchase something through these links, I will make a commission on them.
There will be no extra cost to you and, you could actually save money. Read our full affiliate disclosure here.

